Category: Travel Resources

  • How to Pick Your Next Destination: 8 Questions That Do the Deciding for You

    How to Pick Your Next Destination: 8 Questions That Do the Deciding for You

    Most destination advice starts in the wrong place. It hands you a list of ten beautiful cities and lets you sort it out from there, which is how people end up booking a trip that photographs beautifully and exhausts them by day three.

    I’ve come around to a different approach. Answer eight questions about yourself — who’s coming, how long you have, what your body and your budget will actually tolerate — and the destination mostly picks itself. The map narrows on its own.

    Answer these quickly and honestly. Your gut answer is the useful one. Aspirational answers are how you end up with a rental car in a medieval old town at 9pm looking for parking.

    Two notes before we start. Each answer below points at a type of place first and names examples second — the type is the part that matters, because it’s what lets you apply this to somewhere I’ve never mentioned. And where a place is linked, I’ve been there and written about it. My travel skews European, so that’s where the first-hand recommendations cluster; everywhere else is a starting point for your own research rather than a personal endorsement.

    1. Who’s actually coming?

    This decides more than anything else on the list, and it’s the question people skip fastest.

    • Just me. You can optimize entirely for your own pace, which is a genuine luxury. Look for a walkable city with a good café culture, where sitting alone with a book at dinner is completely normal, and where you feel comfortable walking back to your hotel after dark.
    • Me and one other person. The easiest group size there is. Two people can abandon a plan at 2pm and go sit by a canal instead. You can afford a more ambitious itinerary because you can course-correct without a committee.
    • A small group of adults. Decision fatigue becomes the real enemy — not distance, not budget. Pick one base, agree in advance that splitting up for an afternoon is normal and not rude, and book dinners ahead so nobody’s standing on a corner at 7pm negotiating.
    • Mixed ages, mixed paces. The trip runs at the pace of whoever is most tired, most overheated, or most footsore. That’s not a compromise, it’s just physics. Choose a place where doing less is still worth doing — a town where the sitting-and-watching is as good as the sightseeing.
    • Solo → a dense, transit-rich city where a table for one is unremarkable. Amsterdam, Copenhagen, Edinburgh, Lisbon, Tokyo, Montreal.
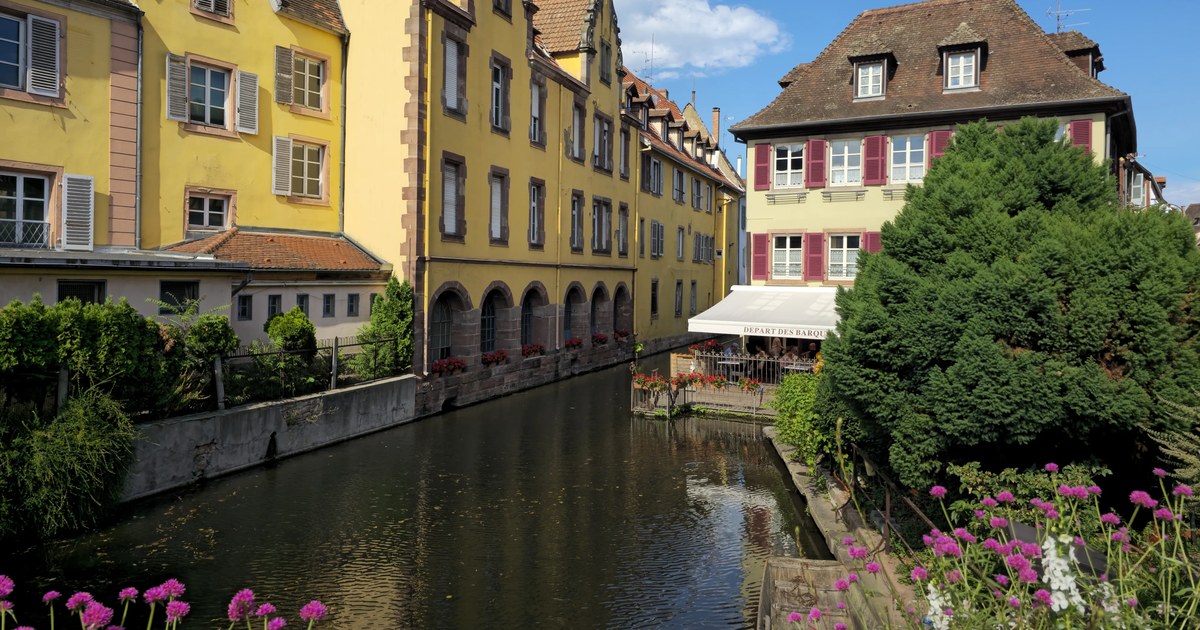
    • Mixed group → a mid-size base with rail service out to smaller places, so the fast people and the slow people can split the day and reconvene at dinner. Luxembourg City, Strasbourg, Kyoto, Salzburg, Santa Fe.
    • Probably skip: Multi-stop rail loops with a big group, remote stays where one restaurant serves everyone, and anywhere the day hinges on a single strenuous activity everyone has to be up for.

    Our summer trip through Belgium, Luxembourg, Alsace, and Switzerland was five travelers, and that number is exactly why we structured it as a few multi-night bases with day trips out, rather than a new hotel every night. Five people packing and unpacking daily would have been the whole vacation.

    2. How many days do you really have?

    Not the number on your time-off request. Subtract the flight over, subtract the flight back, and subtract most of your first day on the ground, because a long-haul arrival day is for showering, walking slowly, and eating an early dinner. Whatever’s left is your actual trip.

    • Under 5 usable days. One city. No day trips, or one at most. Fly into the place you actually want to be.
    • 5 to 8 usable days. One base, two or three day trips out from it. This is the sweet spot for a first international trip, and it’s far more restful than it sounds.
    • 9 to 14 usable days. Two or three bases in one region, three nights minimum each. Now a multi-country or cross-country loop is realistic.
    • Two weeks or more. You can add a genuine rest day in the middle. Do it. A day with nothing on it is what keeps week two from feeling like a chore.
    • Short trip → one city, direct flight, no time lost to jet lag. Domestically that means Charleston, New Orleans, Savannah, Montreal, or Quebec City. Overseas, the ones with the most direct routes: Dublin, Amsterdam, Lisbon, Edinburgh, Reykjavík.
    • 9 to 14 days → one region, a few bases, short hops between them. A Belgium-to-Alsace-to-Switzerland run like ours, a Tokyo–Kanazawa–Kyoto line, Portugal end to end, or a Utah national parks loop.
    • Probably skip on a short trip: Anything requiring an internal flight, Scandinavia end to end, London-and-Paris-in-five-days, and Japan — which deserves more than a long weekend after a flight that long.

    My one hard rule: three nights per base. Two nights means one full day, because arrival afternoon and departure morning don’t count. The math is brutal and it’s why so many itineraries feel like a scramble.

    3. What are your limitations — honestly?

    This is the question I want you to answer least aspirationally of all. Limitations aren’t a smaller trip. They’re a filter, and the trip that comes out the other side is usually better than the one you’d have picked without them.

    • Terrain. Cobblestones, hills, and stairs are the three things that quietly wreck a travel day. Luxembourg City’s lower town is gorgeous and climbing back out of it is genuinely brutal — there’s a free public elevator, and knowing that in advance is the difference between a good day and a bad one. Ask whether the place you’re eyeing is flat.
    • Heat. Air conditioning is not a given in European hotels, restaurants, or trains, and humidity does its own damage elsewhere. If you run hot, midsummer in a stone city is a real risk, not a minor inconvenience. Here’s how I handle it.
    • Food and digestion. If you have IBS, celiac, allergies, or you just know your system, this belongs in the destination decision and not only in the packing list. I research bathrooms, breakfast options, and pharmacy access before I book, not after.
    • Sleep. If you sleep badly in noise, a room over a nightlife street in a busy city center will cost you the whole trip. It’s worth paying more for a quiet side street.
    • Energy. Be honest about how many hours a day you actually want to be out. Four good hours beats nine mediocre ones.
    • Terrain limits → flat, compact, and well served by trams, buses, or a metro when you’re done walking. Amsterdam, Bruges, Ghent, Colmar, Copenhagen, Kyoto, Chicago, Washington DC.
    • Heat-sensitive → go north, go coastal, or go up. Switzerland, Scotland, Norway, the Pacific Northwest, coastal Maine — or anywhere southern in April, May, or October instead of July.
    • Probably skip: Hill towns and stair cities. Lisbon’s Alfama, Edinburgh’s Old Town closes, Cinque Terre, Dubrovnik, Santorini, Tuscan hilltop villages, and San Francisco are all beautiful and all vertical. Add Japan in August, which is punishingly humid, and anywhere your main sight is a long uphill walk with no alternative transport.

    4. What’s the budget, and which part of it can flex?

    A number by itself doesn’t help you pick. What helps is knowing which of the four buckets you’re willing to stretch: getting there, sleeping, moving around once you’re there, and eating.

    • Flights are the constraint. Let the cheap route pick the region, then build the trip around wherever you can land affordably. This is the single biggest lever there is.
    • Lodging is the constraint. Fewer bases. Every hotel change costs you a night’s rate and a half-day of logistics. A hotel with breakfast included saves real money and, more importantly, saves a decision every single morning.
    • Daily spending is the constraint. This is where the choice of country matters enormously.
    • Money is not the constraint, time is. Buy the direct flight, buy the private transfer for the ugly leg, buy the hotel with the good location. Convert money into hours and energy.
    • Tight daily budget → somewhere the everyday costs are low, not just the flight. Portugal, Poland, Czechia, Hungary, much of Germany, Mexico. Japan belongs here too, which surprises people — the food and the trains cost far less than the airfare suggests.
    • Budget can flex → the places that are worth it and will charge you for it. Switzerland, Norway, Iceland, Hawaii. Go in knowing a casual lunch in Zurich costs what a nice dinner costs elsewhere.
    • Probably skip on a tight budget: Switzerland, Iceland, Scandinavia, Hawaii — not because you can’t do them, but because the constant math will follow you around all week. Same for Paris, London, Amsterdam, and New York in peak season, where lodging alone eats the plan.

    Shoulder season deserves a mention here because it moves every bucket at once — cheaper flights, cheaper rooms, thinner crowds, better weather in a lot of places. Late April to early June and September into October are where the value lives.

    5. Evenings in, or evenings out?

    Nobody asks this and it changes everything about which place fits you.
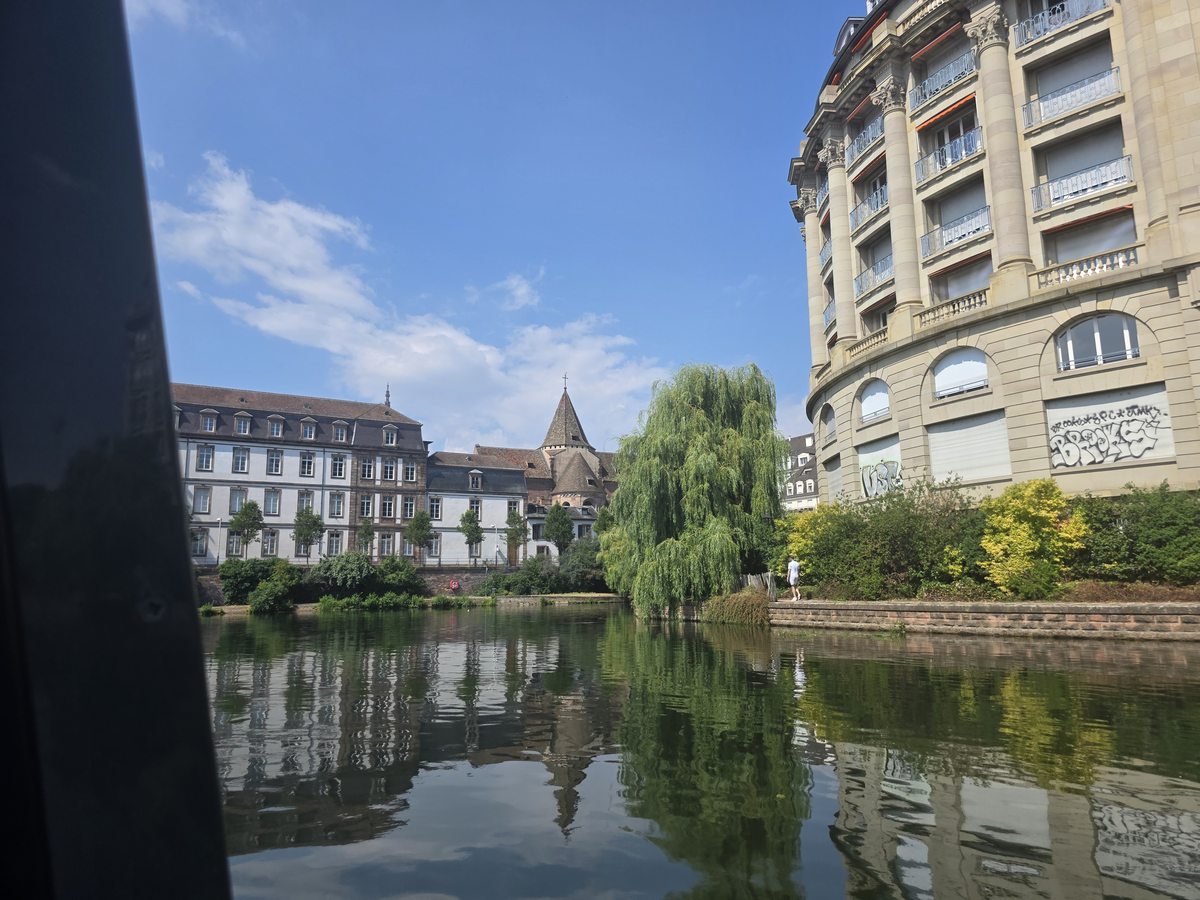
    A wide, still stretch of canal in Strasbourg with a weeping willow and stone buildings reflected in the water, almost nobody around
    A quiet stretch of water in Strasbourg on a weekday afternoon. If your evenings are in, this is the trip you’re shopping for.
    • Evenings in. Then the hotel is the trip, and you should spend accordingly. You want a room with a real chair, a decent bathroom, and ideally a kettle. Bring something to do with your hands; I keep a small puzzle book in my bag for exactly this.
    • Evenings out. Then density is what you’re shopping for. You want dinner, a drink, and a walk home all inside a ten-minute radius. A charming village where the two restaurants close at 8:30 will frustrate you.
    • Genuinely both. Base in the lively place and day-trip to the quiet ones. That direction works far better than the reverse, because getting into a lively city for the evening is much harder than getting out of one for the afternoon.
    • Evenings in → a small town, a lake, or a mountain base where the view from the room is the entertainment. Bruges once the day-trippers leave, Colmar, Lucerne, Alsatian wine villages, a ryokan in small-town Japan, the Oregon coast, coastal Maine.
    • Evenings out → a city center with restaurants and bars inside a ten-minute walk, ideally where the crowd is local rather than touristic. Madrid, Lisbon, Berlin, Porto, Ghent, Tokyo, Osaka, Mexico City, New Orleans, Montreal.
    • Probably skip: If your evenings are out, skip tiny villages, small towns where kitchens close by nine, and resort areas off-season. If your evenings are in, skip a hotel on a main square in high summer — the noise is the whole point of that location.

    6. Warm or cold?

    Answer for your actual thermostat, not for the version of you who likes the idea of a beach.

    • I’d rather be warm → south, and shoulder season if you don’t want to fight crowds. Spain, Portugal, southern Italy, Greece, Malta, Croatia, Mexico, the Caribbean, Hawaii, the American Southwest in spring. Check whether your lodging has air conditioning rather than assuming.
    • I’d rather be cool → north, coastal, or up in elevation. Switzerland and Austria in summer are the good trick — you can take a lift up and drop ten degrees in twenty minutes. The Netherlands, Belgium, Ireland, coastal Scotland, the Pacific Northwest, and coastal Maine rarely get properly hot. Japan is lovely in spring and fall and miserable in August.
    • Cold doesn’t bother me → off-season anywhere good. This is a real advantage and most people won’t use it: empty museums, cheap hotels, cozy evenings. Scotland taught me that. Vienna, Prague, the German and Alsatian Christmas market towns, Quebec City in winter, and Hokkaido are all at their best in the cold.

    Overheating is the single most underrated trip-ruiner I know. Being cold is a jacket problem. Being hot, in a city with stone streets and no shade and no air conditioning to come back to, is an all-day problem. If you run warm, the honest advice is to skip the hot places in July and August entirely — not to pack better for them.

    7. Bustling or quiet?

    Cities aren’t better or worse than small towns, they’re a different trip, and the mismatch is what makes people say a famous place was overrated.
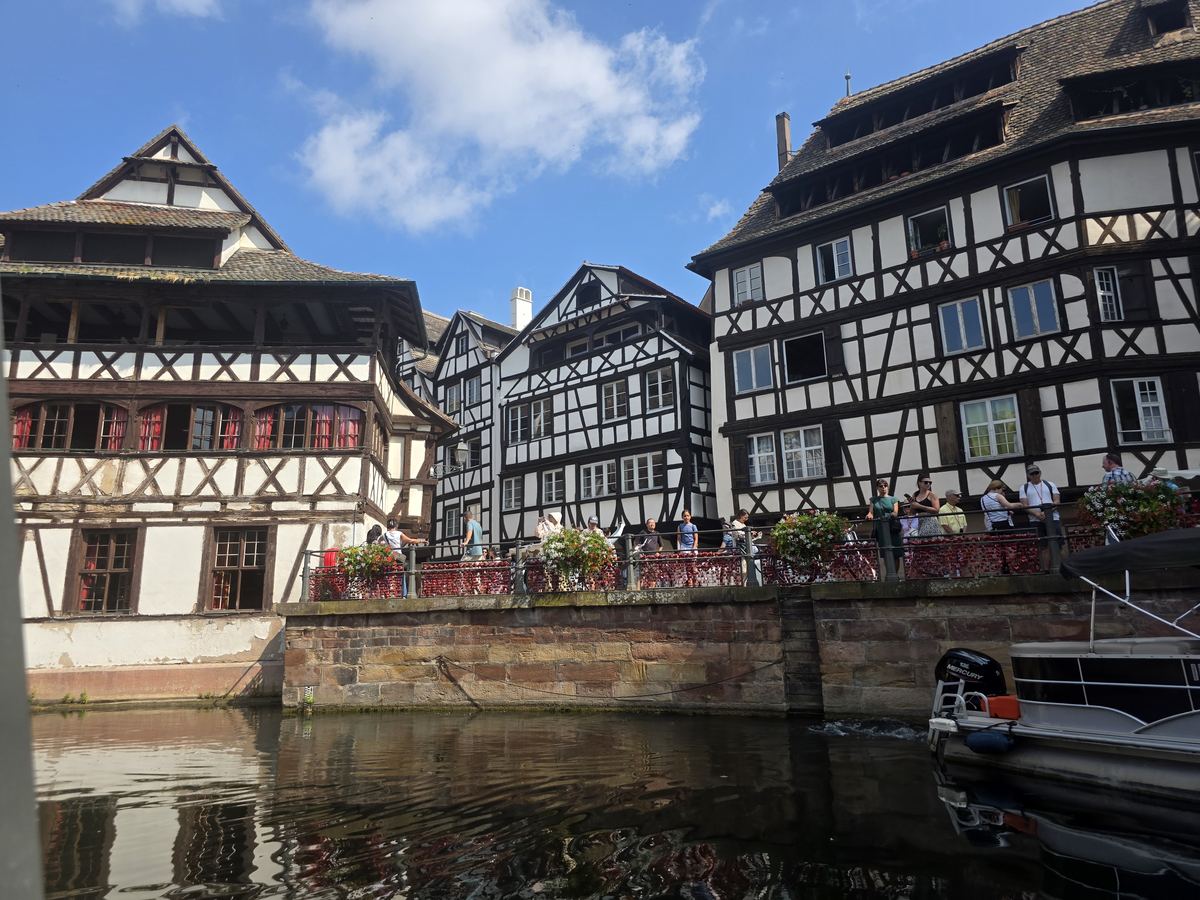
    Crowds of visitors packed shoulder to shoulder on a flower-lined bridge in front of Strasbourg's half-timbered Petite France houses on a summer afternoon
    Petite France, the same city as the photo above, a short walk away. Same afternoon, completely different trip.
    • Bustling → a big city with distinct neighborhoods, museums, and late dinners. Paris, Berlin, Madrid, London, Amsterdam, Rome, Tokyo, New York, Mexico City.
    • Quiet → a small town, a coastline, or a valley where you walk the same three streets twice and start recognizing the shopkeepers. Durbuy, Colmar, Riquewihr, the villages around Lake Lucerne, the Scottish islands, rural Ireland, the Oregon coast, Vermont.
    • In between → a mid-size city, with enough restaurants and evening life to feel alive and small enough to cross on foot. Ghent, Strasbourg, Porto, Bologna, Utrecht, Bergen, Kyoto, Portland, Savannah.

    I’ll be honest about how this played out for us. Brussels was the weakest of our three Belgian cities — it’s a working capital and it feels like one. Bruges won my heart and is very much the quiet-evening answer. Ghent landed right in the middle, with a livelier and less touristed feel. Three cities, an hour apart, three completely different trips depending on which of those you are.

    The one to skip either way: a famous small town in peak season. Bruges at noon in July is not a quiet trip and not a bustling one — it’s a queue. Go in the evening or go in the spring.

    8. How do you want to get around?

    This one looks logistical, but it’s really another energy question. The way you move between places determines how much of you is left when you arrive.

    • Trains → anywhere with a real intercity network. The most restful option there is, and the reason Belgium, Switzerland, Germany, Austria, and the Netherlands are so friendly to carry-on travelers. Japan is the best of all of them — the Shinkansen makes a multi-city trip feel like a commute. Luxembourg goes one better and makes public transit free across the whole country. In the US this really only works in the Northeast Corridor.
    • Rental car → countryside, coastline, wine regions, and national parks. The Oregon coast, Utah’s parks, Vermont, the Scottish Highlands, Iceland’s ring road, Provence, Tuscany, western Ireland. The wrong call for historic old towns, which are hostile to cars by design and expensive to park in. Also worth asking who’s willing to drive, because that person doesn’t get a vacation day.
    • A private driver for one hard leg. My favorite splurge and the most under-considered option on this list. We used one for the long country-to-country stretches, which let us break the drive with stops we’d never have reached by train. You don’t have to do it for the whole trip. One leg is often enough.
    • Walking only → one dense, flat base and a two-mile radius. Entirely valid, and some of the best trips I’ve taken have looked like this. Bruges, Ghent, Colmar, Lucerne’s old town, central Copenhagen, Kyoto’s Gion, old Quebec City.

    What to skip: don’t rent a car for a trip that’s mostly city stops, and don’t try to do a rural region — the Highlands, the Dolomites, rural Ireland, the American West — on public transit alone. Both are the classic mismatch, and both turn a good trip into a logistics project.

    Putting your answers together

    Two answers usually do most of the work, and the pace question and the transport question are the two. Find the combination that sounds like you:

    • Bustling + public transport → a big city with a real metro, and no car at all. Tokyo, Berlin, Madrid, Amsterdam, New York, Mexico City. Stay central, go deep on one place instead of wide across three.
    • Quiet + car → a rural drive with one or two bases and scenery between them. The Oregon coast, the Scottish Highlands, Vermont in fall, Iceland’s ring road, western Ireland. Accept that the driving is part of the trip rather than a tax on it.
    • Quiet + trains → small towns strung along a rail line. Alsace, the Belgian canal cities, the villages around Lake Lucerne, small-town Japan. All the calm of the rural version without anyone having to drive.
    • In between + trains → a mid-size city as a base, day trips out. Ghent, Strasbourg, Kyoto, Porto, Bologna. This is the most forgiving setup there is for a mixed-pace group.
    • Bustling + car → usually a mismatch. If the destination is a big city, park the car or skip it. If you’ve rented one for the countryside portion, drop it before you hit the city and pick it up after.

    Then layer in the other answers to narrow further:

    • Short trip, no jet lag, want it easy. A domestic or near-abroad city break — Charleston, New Orleans, Montreal, Quebec City. One base, four days, no internal travel.
    • Mixed ages and paces, heat-averse, want to do less. One base with a genuinely nice hotel, day trips out, a rest day in the middle. Switzerland or the Alps if the budget stretches, Germany or Luxembourg if it doesn’t.
    • First big international trip, and you want everything to work. Japan. The trains run to the second, the hotels are immaculate, and there’s excellent food at every price point.
    • Solo, longer trip, tight daily budget, happy alone in the evening. Portugal, Poland, or Czechia in shoulder season. Long stays, a rail pass, slow days.
    • Real mobility or terrain limits. Flat, dense, transit-rich: the Netherlands, northern Belgium, Copenhagen, Kyoto, Chicago, Washington DC — modern or flat centers rather than hilltop old towns.

    The one-page version

    Screenshot this and answer it in a notes app before you open a single booking site:
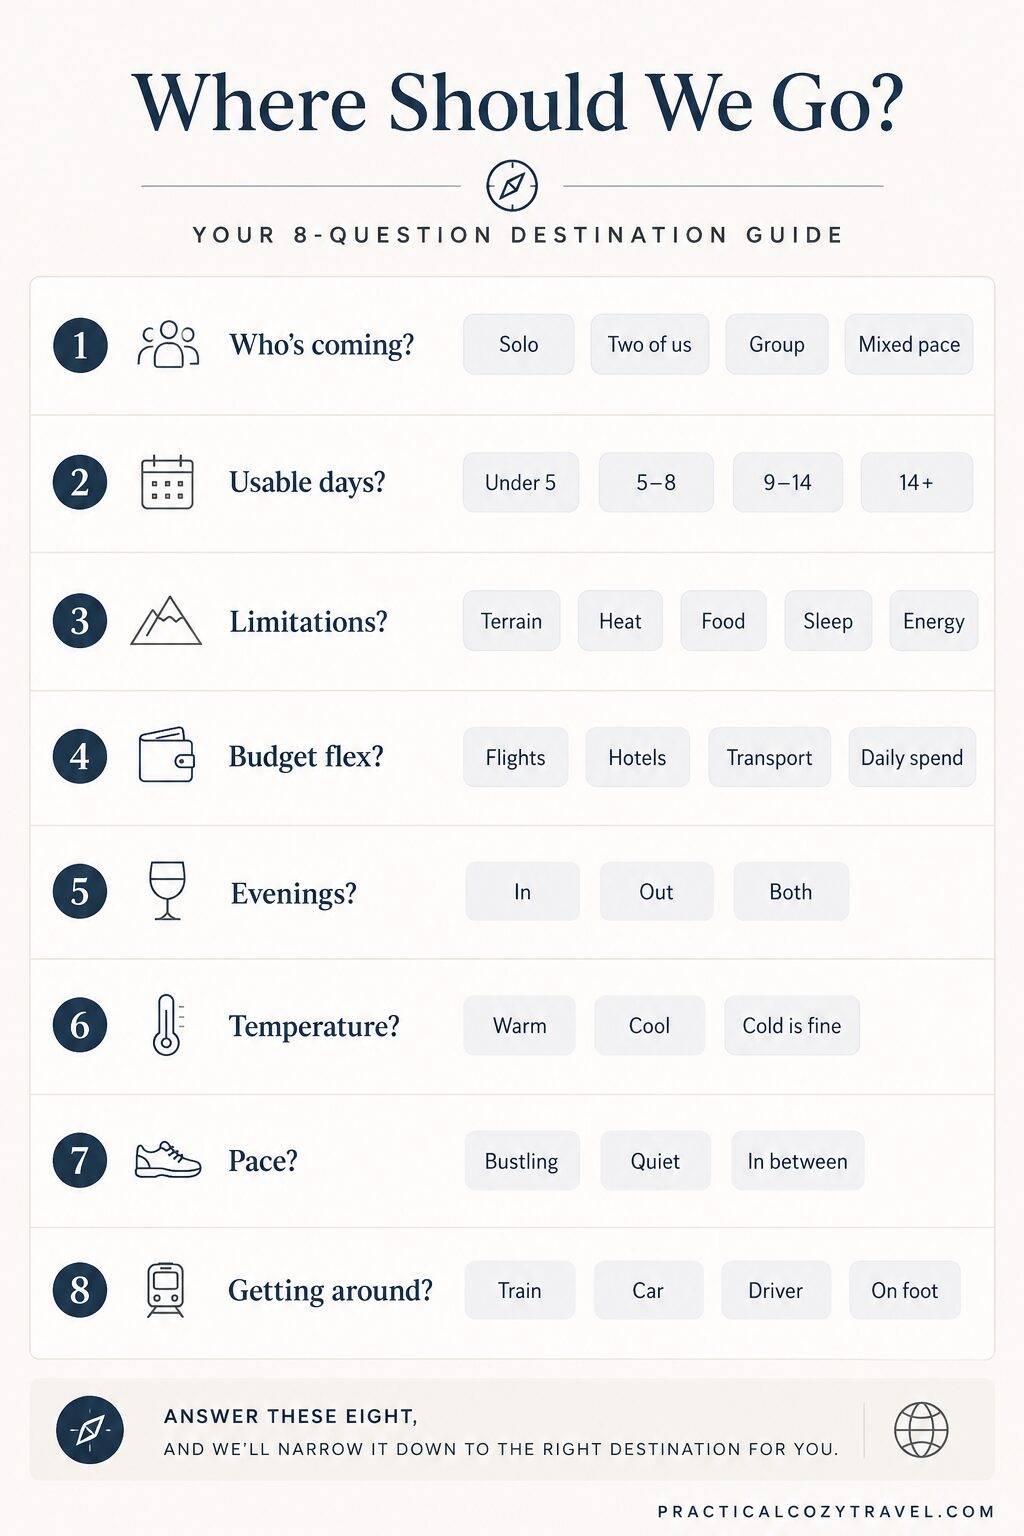
    Chart titled Where Should We Go, listing the eight destination questions and their answer options: who's coming, usable days, limitations, budget flex, evenings, temperature, pace, and getting around
    Save this one to your phone.
    1. Who’s coming, and whose pace sets the trip?
    2. How many usable days are left after travel and arrival day?
    3. What can’t my body do comfortably — hills, heat, long days, unpredictable food?
    4. Which budget bucket can flex: flights, hotels, transport, or daily spending?
    5. Am I out in the evenings or back at the hotel by eight?
    6. Warm or cool?
    7. Bustling or quiet — and can I base in one and visit the other?
    8. Trains, car, driver, or purely on foot?

    Then pick the destination that fits those answers, not the one that fits the highlight reel. The right trip is the one that still feels good on day four — when you’re a little tired, a little footsore, and very glad you didn’t book something more ambitious.


    Related reading

  • How I Used AI to Help Plan Our Europe Trip (And What It Actually Produced)

    How I Used AI to Help Plan Our Europe Trip (And What It Actually Produced)

    This post contains affiliate links. If you purchase through a link, I may earn a small commission at no extra cost to you. Full disclosure here.

    We took this trip across four countries this July — five travelers, four hotels, three private drivers, a dozen trains, and more restaurant decisions than I want to count.

    I love trip planning. I find it genuinely fun. But even I hit a wall somewhere around the third time I was cross-referencing train schedules against hotel checkout times against driver pickup logistics. At that point I did something I hadn’t done before: I handed the whole thing to Claude and asked it to build me a document.

    What came back genuinely surprised me. Not because it was magic, but because it was actually useful — and the places where it wasn’t useful taught me something about what AI is and isn’t good at in travel planning.

    Here’s the honest breakdown.


    What I Asked It to Do

    I had already done the foundational research myself. I knew the destinations, I’d booked the hotels, I had confirmed flights and private drivers. What I didn’t have was a way to hold all of it together in one place that multiple people could actually use — not just a spreadsheet, but something that could live on a phone, work offline, and be printed and tabbed for travelers who prefer paper.

    So I gave Claude a detailed brief of everything I’d already decided and booked, and asked it to build a structured travel guide document. The prompt I used is at the bottom of this post — you can copy and use it directly.


    What It Actually Built

    The output was a comprehensive Word document with:

    A day-by-day itinerary for every day, each formatted the same way: a daily overview, an hour-by-hour schedule, a self-guided walking tour with numbered stops and addresses, a dining section broken down by meal, a reservations summary, placeholder boxes for QR codes and screenshots, and a “Good to Know” section covering photo spots, coffee stops, restroom locations, and rainy-day backups.

    City maps pages with placeholder spaces for printed maps plus clickable Google Maps links for every attraction and restaurant mentioned in the guide.

    A restaurant section organized by city and budget ($ to $$$) with specific recommendations and brief descriptions.

    A local foods guide for each country — what to order, what it is, where to find it.

    Five packing checklists: carry-on, checked bag, hotel checkout, international travel, and flight home.

    Budget trackers for daily spending, shared group expenses, cash, and credit card use.

    Emergency information for all four countries — emergency numbers, hospitals, and US embassy contacts.

    A master reservations log where all confirmation numbers could be filled in as they arrived.


    What It Got Right

    The structure was genuinely excellent. The idea of having every single day follow the same format — same sections, same order — is something I wouldn’t have done left to my own devices. I would have made some days more detailed and some less, depending on how much I knew about each place. Having the same bones every day means anyone can flip to any day and immediately know where to look for what they need.

    The walking tours were solid starting points. For cities I know less well, it gave me a logical route through the highlights with enough context to evaluate whether the order made sense. I adjusted some sequencing based on what I knew about the actual geography, but I didn’t have to start from scratch.

    The emergency information was something I would have put together eventually but almost certainly would have left incomplete. Having hospital names and embassy phone numbers for all four countries in one place, already formatted, was genuinely useful.

    The packing checklists were thorough without being ridiculous. The hotel checkout list in particular — chargers, the safe, under the bed — is the kind of thing that lives in your head until you’re in a cab to the airport wondering if you left something plugged in.


    What I Still Had to Do Myself

    Almost all of the actual research.

    The AI doesn’t know which restaurants are worth it right now. It can give you well-known names from its training data, but it can’t tell you which spots have declined, which are tourist traps that used to be good, or which new places have opened in the last year. For dining specifically, I still looked everything up on Google Maps and recent reviews before including anything.

    It also can’t book things. The private drivers, the brewery tour, the walking and tasting tour — all of that required finding vendors, emailing or calling, negotiating prices, and confirming details. AI built the slots in the document where that information would go. The actual information required me.

    The judgment calls about pacing were mine. The AI gave me an itinerary that looked complete on paper but needed real editing — accounting for different mobility levels in the group, that some travelers are not morning people, that Switzerland is genuinely expensive and we should build in more buffer time there. Those adjustments required knowing the people I was traveling with.

    The local tips — the things that make a guide feel like it was written by someone who’s actually been somewhere — came from my own research, reading other trip reports, and asking people who’d made the same route.


    When This Approach Works Best

    It works best when you’ve already done your research and made your decisions, and you need help organizing it all into something usable.

    It’s less useful at the research stage, where the quality of information matters more than the format. Start with the research yourself. Then use AI to help you build the container.


    The Prompt You Can Use

    Copy and paste this into Claude (or ChatGPT), fill in your details, and give it your confirmed bookings at the end. The more specific you are, the better the output.

    I'm planning a trip to [Destination 1], [Destination 2], [Destination 3], and [Destination 4]
    from [Start Date] to [End Date] with [Number of Travelers] travelers,
    flying from [Home Airport].
    
    Please create a comprehensive printable travel guide for me in a clean,
    structured format. The guide should work both printed and on a phone.
    
    Include these sections:
    
    COVER PAGE with destinations, dates, travelers, and flight route.
    
    TRIP AT A GLANCE with a route table (nights, city, hotel, country),
    flights summary, and a placeholder map box.
    
    HOTELS — one entry per hotel with address, phone, check-in/out dates,
    confirmation number blank, room notes, and Wi-Fi placeholder.
    
    TOURS & TRANSFERS — detailed entry for each booked tour or private driver,
    including pickup/drop-off, route, stops, payment, and driver name blank.
    
    DAILY ITINERARY — one section per day, each with:
    - Daily overview paragraph
    - Weather and transport line
    - Hour-by-hour schedule table
    - Self-guided walking tour with numbered stops (name, Google Maps link, description)
    - Dining by meal (coffee, lunch, treat, drinks, dinner)
    - Local foods to try that day
    - Reservations table for that day
    - QR/ticket placeholder boxes
    - Good to Know (photo spots, coffee stops, restrooms, rainy-day backup,
      packing reminder for tomorrow)
    - Notes lines
    
    CITY MAPS — one per city with placeholder map box, hotel/station links,
    bulleted attractions and restaurants.
    
    QR CODE VAULT — placeholder boxes for hotels, transport, tours, restaurants.
    
    RESTAURANT RECOMMENDATIONS — by city and budget ($ / $$ / $$$).
    
    LOCAL FOODS TO TRY — by country/region, with dish names and descriptions.
    
    TRANSPORTATION — airport transfers, train routes, tips, private driver table.
    
    PACKING CHECKLISTS — carry-on, checked bag, hotel checkout,
    international travel, flight home.
    
    BUDGET TRACKERS — daily spending, shared expenses, cash log, credit card log.
    
    EMERGENCY INFORMATION — emergency numbers, hospitals, embassy contacts,
    money/power/customs summary.
    
    RESERVATIONS & CONFIRMATIONS — master log tables for hotels, drivers,
    tours/tickets, and trains.
    
    NOTES — blank lines for journaling.
    
    Here are my confirmed bookings:
    
    Flights:
    - [Outbound: Date, Airline, Flight #, Route, Departure time, Arrival time]
    - [Return: Date, Airline, Flight #, Route, Departure time, Arrival time]
    
    Hotels:
    - [Hotel Name, City, Dates, Full address, Phone number]
    - [Hotel Name, City, Dates, Full address, Phone number]
    - (continue for each hotel)
    
    Confirmed tours and transfers:
    - [Date: What, time, price, payment method, any stops]
    - [Date: What, time, price, payment method, any stops]
    - (continue for each booking)
    
    Any other confirmed items:
    - [Description, date, details]
    
    Please format every walking tour stop with a Google Maps link using:
    https://www.google.com/maps/search/?api=1&query=[encoded+place+name]
    
    Make the structure identical for every day so it’s easy to navigate
    both in print and on a phone.

    A few things to check before you use the output: verify all restaurant recommendations are current (AI training data gets stale), double-check train schedules and prices on the actual rail website, and fill in the blanks that only you can fill in — confirmation numbers, driver names, your actual preferences on pace and how much walking the group can handle.

    The AI builds the container. You fill it with the real trip.


    One More Thing: Document It While You’re There

    The planning gets you to the trip. The journal brings it home with you.

    Every travel journal I picked up over the years assumed I wanted to schedule my days down to the minute and tick off a list of sights. That’s never been how I travel. So I made one that isn’t like that. Cozy Travels is a comfort-first travel journal with a pace tracker on every page, a Comfort Find of the Day prompt, and room for the slow moments that don’t make it onto any itinerary. It’s the journal I wished I’d had on every trip I’ve taken.

    → See Cozy Travels on Amazon


    As an Amazon Associate, I earn from qualifying purchases. See my full Affiliate Disclosure for details.

  • How I Prepare My Cats Before a Trip (So I Can Actually Enjoy Being Away)

    How I Prepare My Cats Before a Trip (So I Can Actually Enjoy Being Away)

    This post contains affiliate links. If you purchase through a link, I may earn a small commission at no extra cost to you. Full disclosure here.

    Packing for a trip when you live alone with two cats means you’re actually preparing for three departures: yourself, your home, and your pets. The logistics of my own travel — packing, getting to the airport — are the easy part. Making sure Jasper and Nugget are taken care of while I’m gone is what I think about more.

    I’m lucky. I have family who can usually step in to watch them, depending on who’s traveling with me. But even with people I trust completely, I don’t just hand over a key and hope for the best. Jasper is pretty easy. Nugget is shy enough that first-time cat sitters can go an entire visit without actually seeing her. There’s prep involved, and over the years I’ve figured out what actually makes a difference.

    Here’s how I set up the house before I leave.

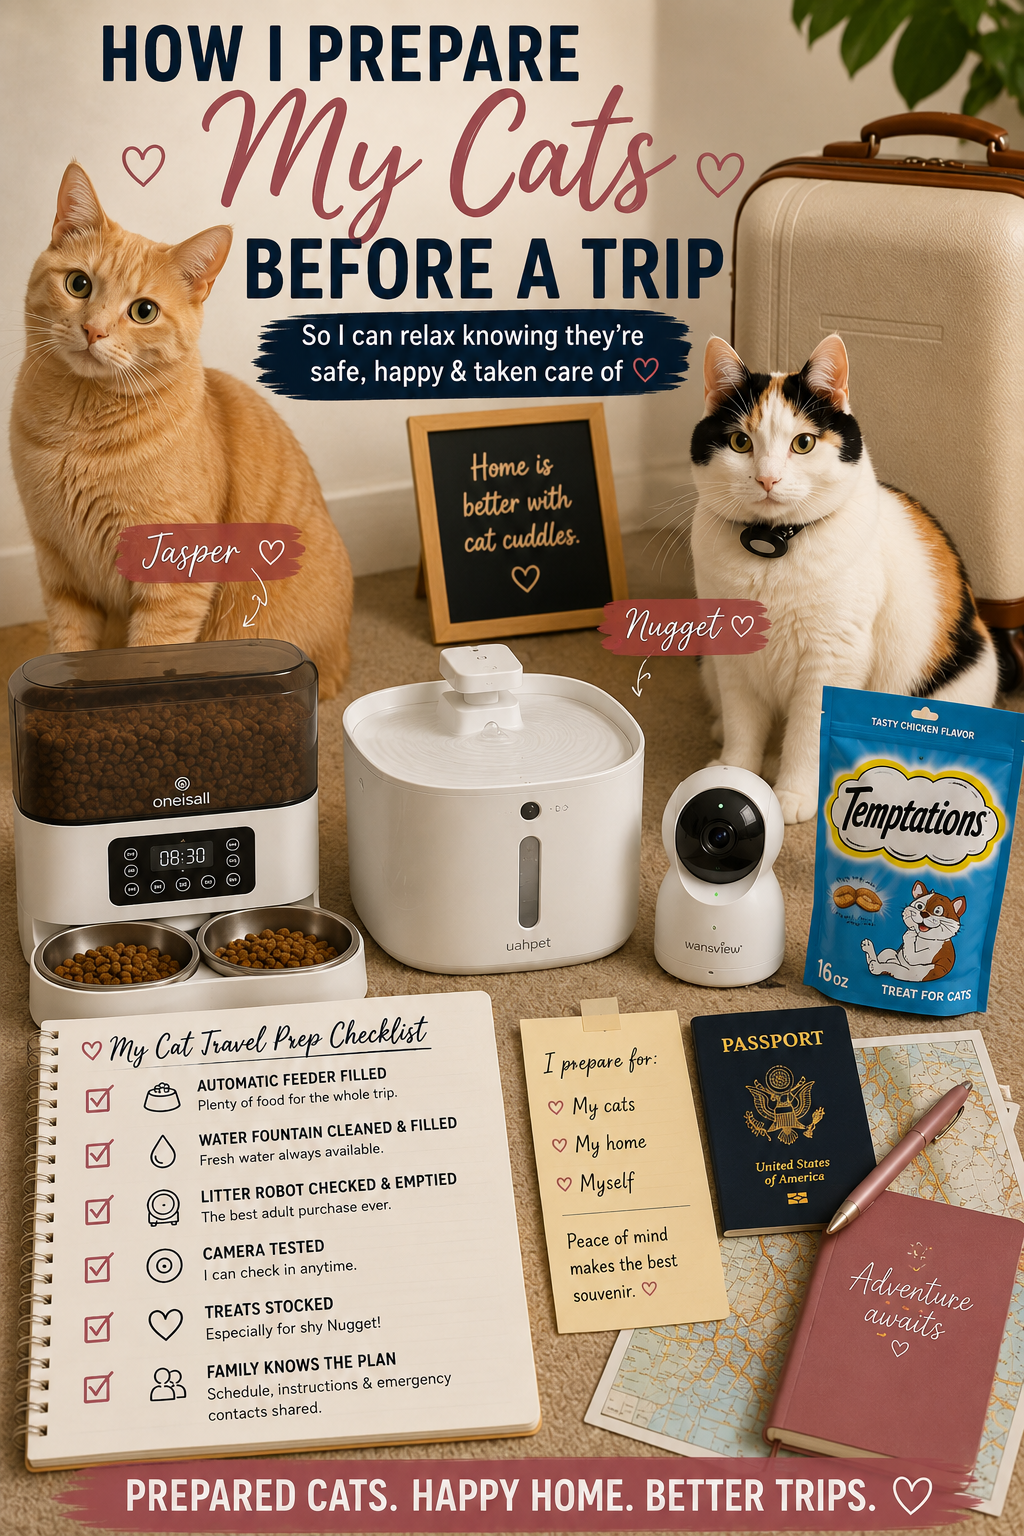
    How I prepare my cats Jasper and Nugget before a trip — cat travel prep checklist infographic

    The Feeder: One Less Thing to Coordinate

    Even when someone is coming to check on the cats, I run an automatic feeder. It removes the timing pressure from whoever is watching them — they don’t have to be there at exactly 7am and 6pm, the feeder handles it.

    The oneisall Automatic Cat Feeder holds up to 20 cups and works for two cats, which is exactly what I needed. You can program multiple feeding times throughout the day, control portions, and it works with dry food. Having it means that even if my family member’s visit is a bit earlier or later than planned, the cats aren’t waiting on their meals. It also gives me peace of mind on longer trips or days when the schedule gets complicated.


    The Water Fountain: Worth Every Penny

    Cats are notoriously bad at drinking enough water. A stagnant bowl is usually less appealing to them than moving water, which is part of why fountains work better — but most fountains are also a cleaning hassle with pumps and filters that need regular attention.

    I switched to the uahpet Wireless Cat Water Fountain specifically because it has no pump. It’s battery-operated, has a motion sensor that activates the flow when a cat approaches, and is genuinely easy to clean. The 2L capacity is enough for a few days without needing to be refilled, and for travel it means the person checking on the cats doesn’t have to stress about water levels constantly.

    No pump was the specific feature I was looking for and I haven’t looked back since.


    The Litter Robot: My Best Adult Purchase

    I’ll say it plainly: the Litter Robot is the best thing I’ve bought for myself as a cat owner, and it makes a real difference when I travel. Not having to ask my family to scoop litter is a significant reduction in what I’m asking of them. It handles itself, has an app where I can monitor usage, and takes one major task entirely off the pet-sitting plate.

    If you’ve been on the fence, use this referral link to get $50 off. If you have cats and you travel even occasionally, I genuinely think it’s worth it.


    The Camera: For Peace of Mind (and Honestly, Because I Miss Them)

    I’ll be honest: I set up the camera partly as a practical tool and partly because I miss my cats when I travel and I like being able to check in on them.

    The wansview 2K Indoor Camera is what I use. It has motion detection, night vision, two-way audio, and connects to an app so I can see what’s happening in the house from anywhere. My family knows the camera is there — I always make sure of that. If you’re using a camera and it’s not family watching, make sure your pet sitter knows it’s there. That’s just the right thing to do.

    The motion detection is useful for catching when Nugget finally comes out to investigate a new person, and for generally knowing the cats are okay without having to text someone every few hours.


    The Treats: The Key to Nugget

    Nugget is shy. Very shy. She’s the kind of cat who will disappear for an entire visit from someone she doesn’t know well, and even with family she takes time to warm up.

    Before I leave, I always make sure we’re stocked up on Temptations Cat Treats — the Tasty Chicken flavor is the one she can’t resist — and I specifically tell whoever is watching them to use the treats as a way to coax her out. It works better than anything else. She’ll come for treats when she won’t come for anything else, and it gives the person caring for her an actual tool to check that she’s okay rather than just hoping she emerges on her own.

    Jasper needs no coaxing. Jasper will have introduced himself before the person has put their bag down.


    The Sitter Briefing: What I Actually Tell People

    Even with family who knows the cats, I always leave a note. It doesn’t have to be long, but it covers:

    • Feeding schedule and where the food is (even with the auto feeder, knowing where the backup supply is matters)
    • Any quirks — Nugget hides, use treats, she’s fine she’s just shy
    • Vet contact information
    • Where the cat carrier is, just in case
    • My number saved in their phone with permission to use it

    I also make sure they have my number and know I actually want them to text me if something seems off. I’d rather get an unnecessary check-in than have something go wrong because someone didn’t want to bother me on vacation.


    The Honest Part: Traveling Alone With Pets Takes More Preparation

    When you live alone with pets, there’s no one else to coordinate this on your behalf. You’re the one who sets up the feeder, tests the camera, stocks the treats, writes the note, and briefs whoever is coming to help. You’re also the one who fields the texts while you’re away and does a quick check of the camera app before bed even when you’re in a different time zone.

    It’s worth it. Jasper and Nugget are worth it. But I’m not going to pretend it’s effortless — it’s just part of what traveling solo with pets looks like, and getting the right setup in place makes it manageable enough that I can actually be present wherever I am instead of worrying about what I left behind.


    The Pre-Trip Pet Checklist

    Before I leave for any trip longer than a night:

    ✓ Auto feeder programmed and stocked
    ✓ Water fountain charged and filled
    ✓ Litter Robot emptied and checked ($50 off here)
    ✓ Camera online and motion alerts on
    ✓ Treats stocked (extra for Nugget)
    ✓ Sitter briefed with written notes
    ✓ Vet info and carrier location confirmed
    ✓ My number saved in their phone with permission to use it

    Get this right and you can actually enjoy being away. That’s the goal.


    As an Amazon Associate, I earn from qualifying purchases. See my full Affiliate Disclosure for details.

  • How I Plan a Trip When I Have IBS (What I Actually Research Before I Book)

    How I Plan a Trip When I Have IBS (What I Actually Research Before I Book)

    This post contains affiliate links. If you purchase through a link, I may earn a small commission at no extra cost to you. Full disclosure here.

    There’s a version of travel planning that looks like researching museums and finding the best restaurants. My version of travel planning includes all of that — and also figuring out where the nearest pharmacy is, whether the hotel is close to food I can actually eat, and making sure I have enough medication to cover a bad day plus a few extra.

    I have IBS. It’s been part of every trip I’ve taken, and at this point it’s just part of how I travel. Most of the time it’s manageable. Sometimes it isn’t. The Scotland trip where I ate the wrong thing on the plane and spent an entire day unable to leave my hotel room was a hard reset on how seriously I take the planning side of this.

    Here’s what I actually research before I book — and what I keep in my bag so a bad day stays a bad day instead of becoming a ruined trip.

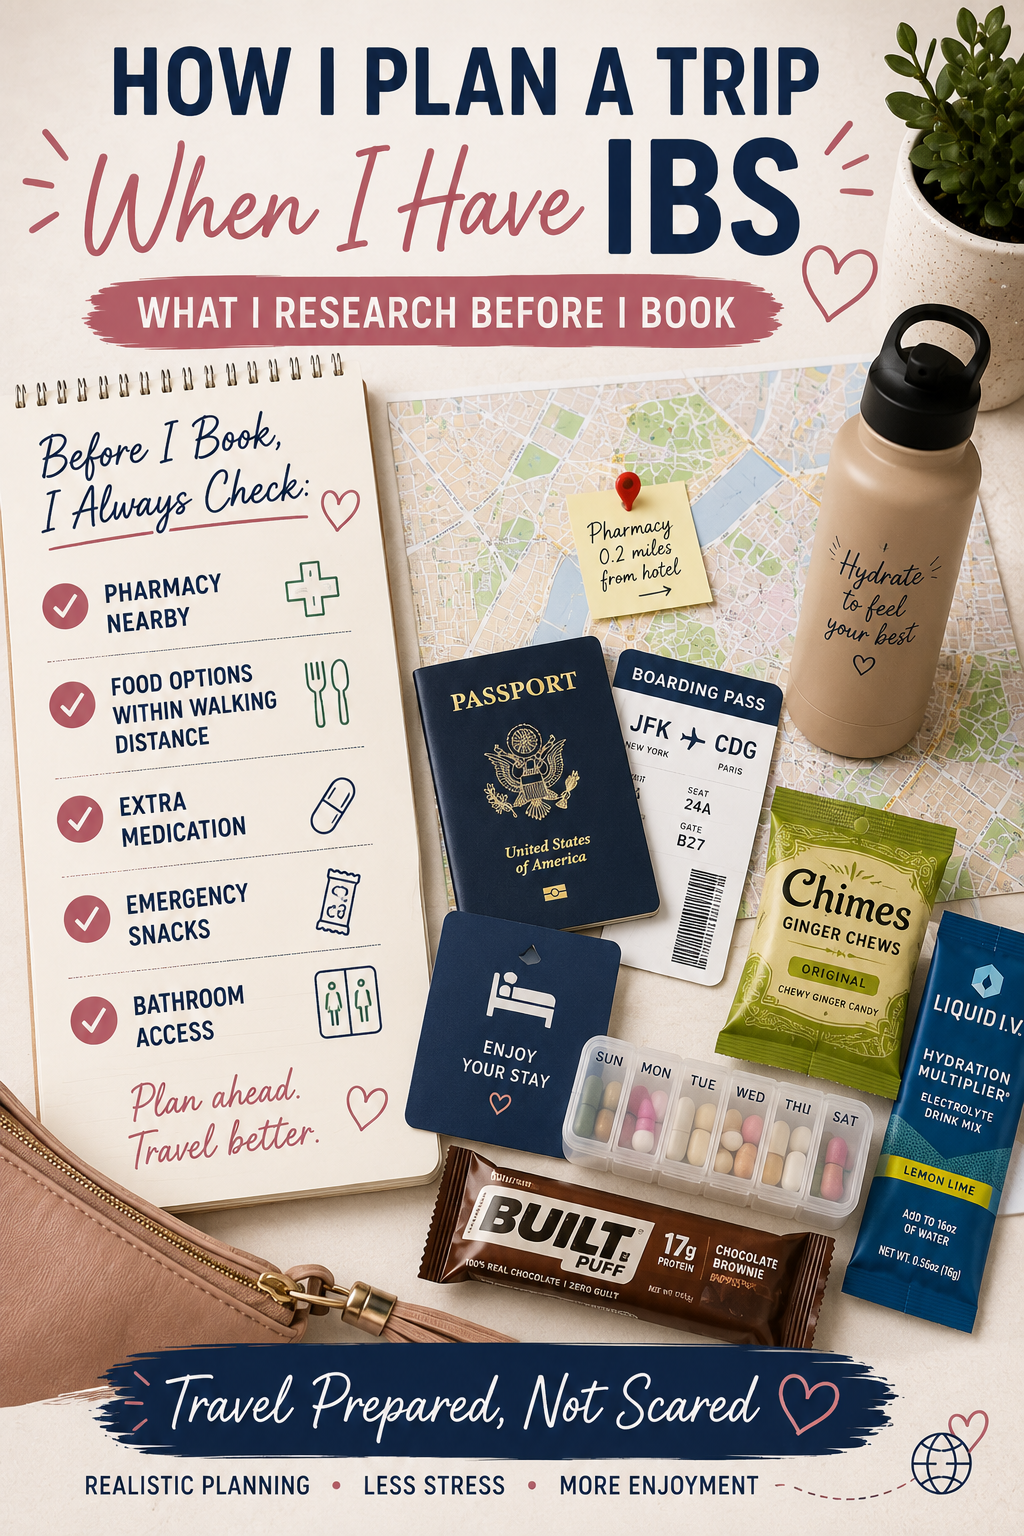
    How I plan a trip when I have IBS — what I research before I book infographic

    Before I Book: What I’m Actually Looking At

    Hotel location relative to food options

    This is the first thing I check, before reviews, before price, before amenities. I need to know what’s walkable from the hotel when I’m not feeling well enough to go far.

    A great hotel in a location where the nearest food is a 20-minute walk or a taxi ride is a problem for me on a flare day. I’m looking for somewhere with easy access to a grocery store, a café, or somewhere I can get something plain and simple without it being a production. Markets and supermarkets are actually ideal — I can get crackers, fruit, rice-based things, whatever I need without navigating a restaurant menu when I’m already not feeling well.

    I also check whether there’s a kettle in the room. It sounds minor. It matters more than I’d like to admit on bad mornings.

    Pharmacy access

    Before every trip I look up where the nearest pharmacy is to my hotel and note the hours. In Europe this is usually straightforward — pharmacies are common, well-stocked, and the staff are often more knowledgeable and willing to help than you’d expect. In some countries pharmacists can advise and recommend without a prescription for things that would require one at home.

    I note whether it’s a chain or independent, what the hours are, and whether it’s open on Sundays. I’ve never had to use this information in an emergency, but having it means I’m not Googling “pharmacy near me” in a foreign city while already anxious and unwell.

    Bathroom access at the places I want to visit

    I quietly check this before major sightseeing days. Most major tourist sites in Europe have facilities, but knowing in advance — and knowing where they are when I arrive — is different from hoping they exist. I do a quick scan when I first get to a location and note the exits and bathrooms before I settle into enjoying it. It takes about two minutes and it makes a significant difference to how relaxed I can be for the rest of the visit.


    Before I Fly: Medication and Supplies

    I always bring more medication than I think I’ll need. Not slightly more — significantly more. Enough for the trip, plus a buffer for delays, plus extra for a genuinely bad stretch. Running out of anti-diarrheal medication in a foreign country when you need it is not a situation I’m willing to be in.

    Everything goes in my carry-on. Not my checked bag, not my suitcase — my personal item, with me on the plane. If anything ever gets lost or delayed it will not be my medication.

    My travel medication kit includes: anti-diarrheal (Imodium or equivalent), antacids, whatever prescription medications I take regularly, Chimes Ginger Chews for nausea and general stomach settling, and MQ Motion Sickness Patches because turbulence and motion on top of an already unsettled stomach is its own category of miserable.

    I also keep a travel pill organizer so everything is sorted and I’m not digging through a bag for a specific bottle when I need it quickly.


    The Plane Food Problem

    The Scotland trip taught me this the hard way: plane food is unpredictable, and for someone with IBS, unpredictable food at 35,000 feet with no exit option is a real risk.

    I now eat very lightly before and during flights. If there’s meal service I’ll check what’s being served in advance where I can, but mostly I default to bringing my own food and treating the plane meal as optional rather than expected.

    What I bring: BUILT Bar Puff Protein Bars are my go-to because they’re light enough to eat when I’m not fully hungry but substantial enough to count as a meal if I need them to. Crackers, trail mix, and something plain and easy round it out. I also add a Liquid I.V. packet to my water bottle after boarding — staying hydrated is genuinely protective on flights, and IBS symptoms tend to be worse when I’m dehydrated.

    The goal isn’t to have a great meal on the plane. It’s to land feeling okay.


    On the Ground: Eating in a Way That Actually Works

    Small meals throughout the day

    This is the single most effective thing I do. On busy sightseeing days — especially in heat, especially when I’m walking a lot — eating one or two large meals is a reliable way to end up feeling terrible by afternoon. Small amounts of food more frequently keeps my system stable in a way that nothing else really does.

    This requires a bit of planning because it means having snacks accessible rather than waiting until I’m hungry and then finding somewhere to eat. I keep something in my bag at all times: protein bars, crackers, whatever I picked up at the grocery store that morning. It’s not about eating constantly — it’s about never arriving at a meal completely empty and never eating until I’m uncomfortably full.

    Knowing what to order before I get to the table

    I check menus online before I go somewhere. Not always, not obsessively — but for a restaurant I’m genuinely excited about or somewhere where I know the options might be limited, I look at the menu in advance so I already know what I’m ordering when I sit down. This removes the stress of scanning a menu in a busy restaurant while the table is looking at me and I’m trying to figure out what’s safe.

    I also look for grain and rice-based dishes, simple proteins, and things that aren’t heavily sauced or fried. Most cuisines have options that work — it’s just easier to find them when you’re not doing it under pressure.

    Finding a “safe” place near the hotel

    Within the first day of arriving somewhere, I find one reliable nearby option where I know what I can eat. A café, a grocery store, a simple restaurant. This becomes my backup for days when I’m not feeling adventurous with food — when I’d rather have something predictable than deal with the uncertainty of somewhere new. Having that option removes a lot of anxiety from the rest of the trip.


    Traveling With People Who Know

    I usually travel with family, which makes this easier in one specific way: they know, they don’t make it a big deal, and I don’t have to explain or manage anyone else’s reaction on a bad day.

    If you’re traveling with someone who doesn’t know, I’d generally advocate for telling them. Not because you owe anyone your medical history, but because a bad day is significantly harder to navigate when you’re also managing someone else’s confusion about why plans are changing. Telling people in advance also means you can build in flexibility without it feeling like a problem — a slower morning, a change of restaurant, an afternoon back at the hotel — because it’s been framed as part of how the trip works rather than a last-minute disruption.


    What I Keep in My Day Bag

    Every single day, regardless of how I’m feeling when I leave the hotel:

    • Anti-diarrheal medication
    • Antacids
    • Ginger chews
    • A snack (protein bar or crackers)
    • A small water bottle with a Liquid I.V. packet
    • An extra pair of underwear

    That last item is the one most IBS travel guides won’t mention, and it’s the most practical thing on the list. A bad flare day sometimes escalates faster than expected, and having a spare means a difficult hour doesn’t have to become a ruined day. It takes up no space. It provides an outsized amount of peace of mind. If you have IBS and you’re not already doing this, start.


    The Mindset Shift That Actually Helps

    The Scotland day was genuinely terrible. I was sick, I was frustrated, I was upset about losing a day of a trip I’d been looking forward to. And then — nothing catastrophic happened. The trip continued. I felt better the next morning. We adjusted the plan and moved on.

    IBS is unpredictable, which means some trips will have a bad day in them no matter how well I’ve planned. The planning isn’t about guaranteeing that nothing goes wrong. It’s about reducing the variables I can control so that when something does go wrong, it’s easier to manage and faster to recover from.

    That’s the version of travel that works for me. Not avoiding trips because something might happen — but going, prepared, with the realistic expectation that most days will be fine and the occasional hard one is survivable.


    As an Amazon Associate, I earn from qualifying purchases. See my full Affiliate Disclosure for details.

  • How I Stay Cool and Comfortable as a Plus-Size Woman While Traveling

    How I Stay Cool and Comfortable as a Plus-Size Woman While Traveling

    This post contains affiliate links. If you purchase through a link, I may earn a small commission at no extra cost to you. Full disclosure here.

    There’s a specific kind of miserable that comes from being overdressed, overheated, and still trying to enjoy a vacation. I’ve been there more times than I’d like to admit — wearing an outfit I thought would look good in photos, spending the afternoon uncomfortable and distracted, and wishing I’d just packed the practical thing.

    Traveling as a plus-size woman in warm weather takes some real planning. Not because it has to be complicated, but because the wrong choices show up faster — thigh chafing after twenty minutes of walking, overheating in a fabric that doesn’t breathe, hitting a wall of fatigue by 2pm because hydration got deprioritized. These aren’t aesthetic problems. They’re comfort problems, and they’re solvable.

    Here’s what actually works for me.

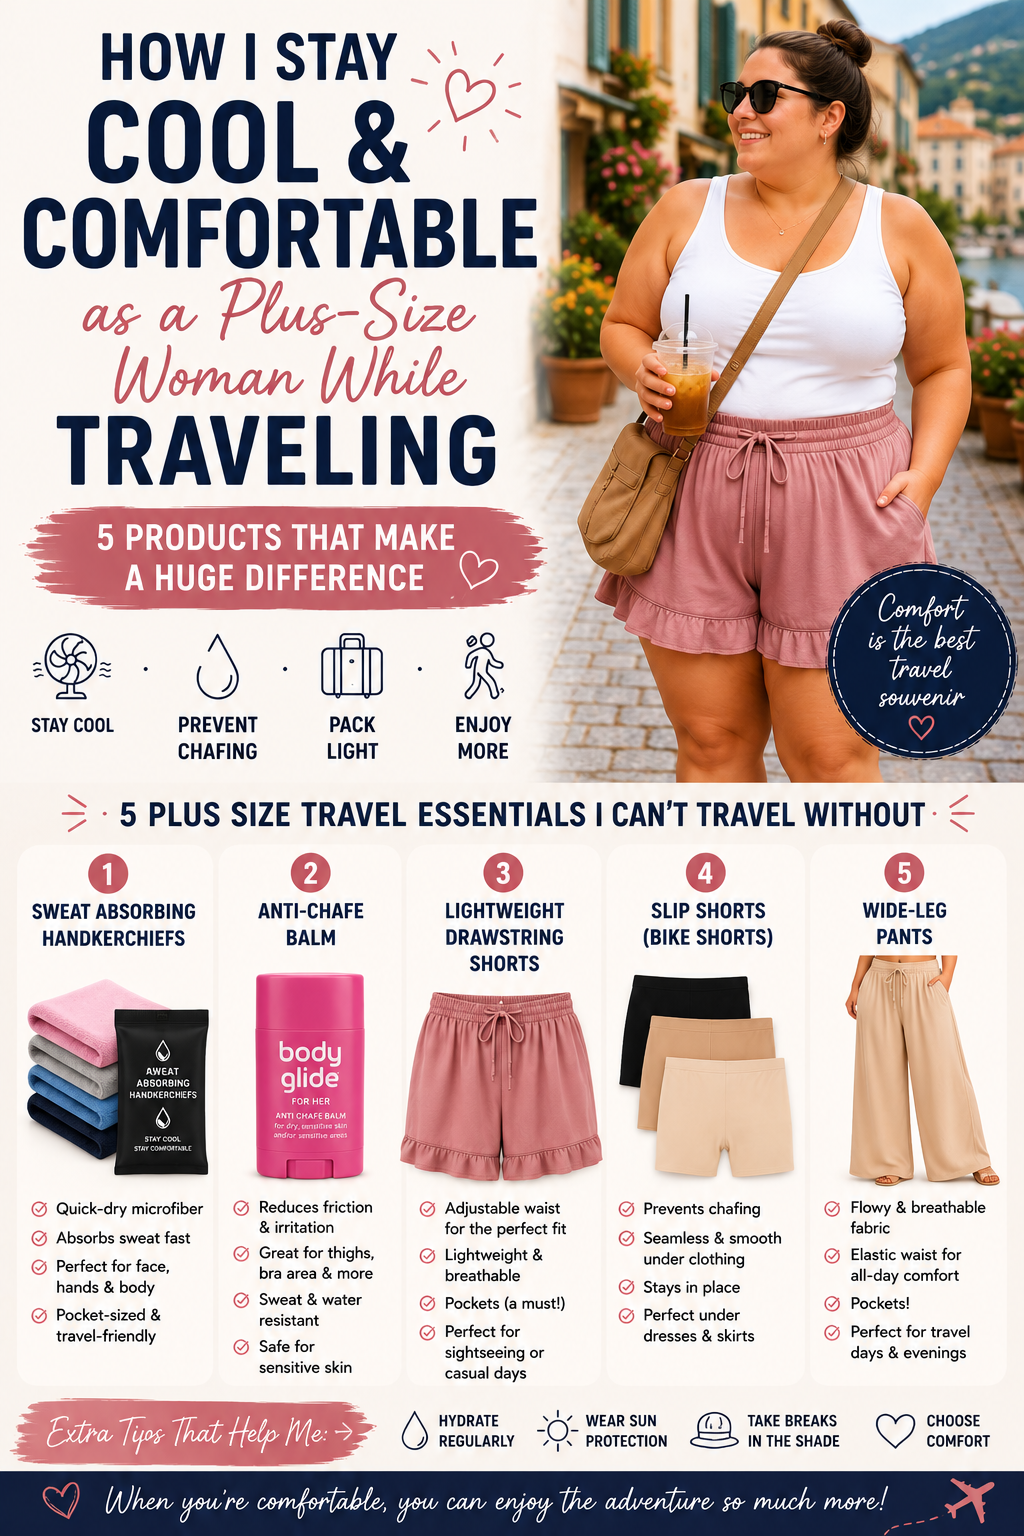
    How I stay cool and comfortable as a plus-size woman while traveling — 5 travel essentials infographic

    1. Wear Lightweight Fabrics — And Mean It

    Not every fabric that says “lightweight” actually breathes. Polyester blends marketed as travel-friendly can feel like wearing a plastic bag in July. What actually works in heat: linen, loose cotton, bamboo, or moisture-wicking fabrics designed for movement rather than just for looking neat.

    My warm-weather travel uniform has shifted almost entirely toward flowy options. The Sampeel Wide Leg Pants are a go-to — palazzo-style with elastic waist and pockets, they work for a casual sightseeing day and somehow don’t look sloppy. A linen shirt dress is the other piece I reach for constantly, because it goes from morning walk to dinner without a change and never feels heavy.

    The rule I use: if I wouldn’t want to walk a mile in it at home in summer, it doesn’t come on a warm-weather trip.


    2. Bring Anti-Chafe Protection — Don’t Wait Until You Need It

    Thigh chafing is not a you problem. It’s a friction problem, and friction is solvable.

    I keep Body Glide For Her in my bag and apply it before any day that involves significant walking. It goes on like a deodorant stick, stays put through heat and humidity, and the difference between a day with it and a day without it is not subtle. The For Her version includes added emollients, making it gentler on sensitive skin. Megababe is another option that works similarly if you prefer a different brand.

    Apply it before you leave the hotel, not after the chafing starts.


    3. Hydrate Before You Feel Thirsty

    Thirst is a lagging indicator. By the time you feel it, you’re already behind, and in heat and humidity that gap gets worse fast.

    I add a Liquid I.V. Hydration Multiplier to my water bottle at the start of every warm-weather sightseeing day. It uses a cellular transport technology that helps your body absorb water more efficiently than plain water alone — which matters more when you’re sweating continuously and replacing fluids all day.

    I also carry sweat-absorbing handkerchiefs — quick-dry microfiber, pocket-sized. Blotting your face and neck with something that actually absorbs sweat is different from using a regular tissue or your shirt, and they dry fast enough to use repeatedly throughout the day.


    4. Choose Breathable Shoes

    Shoes are the easiest place to make a mistake you’ll feel all day.

    Anything with a closed toe in real heat becomes a problem within hours. Anything that isn’t actually broken in becomes a problem faster. In warm weather I prioritize sandals with arch support or walking shoes with mesh — shoes where airflow is built into the design, not an afterthought.

    If you’re going somewhere that involves cobblestones, uneven terrain, or long stretches without seating, test your shoes at home first. The comfortable-looking sandal that works for a two-hour errand is not necessarily the sandal for eight hours of walking in a foreign city.


    5. Pack an Extra Shirt

    On warm-weather days I pack a backup top in my day bag. This is not about being overprepared. It’s about not spending an afternoon in a damp shirt feeling self-conscious when a simple swap would fix it.

    A lightweight shirt takes up almost no space. The mental relief of having the option is worth it.


    6. Wear Bike Shorts or Slip Shorts Under Dresses

    This goes together with the anti-chafe point, but it’s worth its own section because it changed how I approach dresses and skirts entirely.

    I wear slip shorts under almost every dress now. The seamless slip shorts are the ones I’ve landed on — smooth boyshorts style, no seam lines under fitted fabrics, and they stay put through a full day of walking. For days when I want more casual comfort, the OLRIK Plus Size Shorts with the ruffle belted waist are the ones I reach for — lightweight, adjustable drawstring, actual pockets, and they don’t feel like athletic wear even though they’re completely comfortable to move in.


    7. Take Afternoon Breaks — Actually Schedule Them

    This one sounds obvious and is consistently underestimated.

    The 1–4pm window in summer heat is brutal, and pushing through it usually means arriving at dinner exhausted and starting the next day behind. The trips where I’ve built in a midday break — back to the hotel or to a shaded café — are categorically better than the ones where I tried to maximize every hour.

    The JISULIFE 3-in-1 handheld fan has become something I carry on any day with outdoor time. It’s pocket-sized, charges via USB, runs up to 19 hours, and also works as a power bank and flashlight. Personal airflow is genuinely underrated as a heat management tool. A cooling towel works on the same principle: wet it down, drape it on your neck, and the temperature difference is immediate.


    8. Carry Electrolytes All Day

    Water matters. Electrolytes matter more when you’re sweating continuously.

    The headache and fatigue that hits mid-afternoon on hot travel days is usually less about the heat and more about electrolyte depletion. I carry Liquid I.V. packets and use them throughout the day, not just in the morning. On particularly hot days I’ll go through two.

    If you’ve ever had a day where you drank plenty of water and still felt awful by afternoon — this is likely why.


    9. Prioritize Sun Protection

    This is the one I see people skip most often, and it costs them most visibly.

    Sunburn on top of heat is miserable in a specific way — it makes everything harder, including sleep, which then compounds into the next day. I apply SPF before leaving the hotel, reapply after any significant outdoor stretch, and carry a hat for afternoons in direct sun. A cooling towel, dampened slightly and draped on your neck or face, also makes a real difference in how long you can stay comfortable before needing shade.


    10. Stop Dressing for Photos and Dress for Comfort

    This is the one I wish someone had told me earlier.

    I spent a lot of trips in outfits I’d chosen based on how they’d look in pictures. The problem is that the discomfort of the wrong outfit affects everything — your energy, your patience, how present you can actually be. You notice the heat more. You want to stop sooner. You’re thinking about your clothes when you could be thinking about where you are.

    The shift that made the biggest difference: choosing clothes for the trip I was actually taking rather than the Instagram version of it. Loose pants instead of jeans. Breathable fabric instead of a structured piece that photographs well. Shoes with actual support instead of something that looks better standing still.

    You will feel better, and the photos will still be fine. I promise.


    My hot weather travel survival kit — crossbody bag, water bottle, sweat handkerchiefs, Body Glide, Liquid I.V., portable charger, sunglasses, and lip balm

    The Honest Warm-Weather Packing List

    For any trip where heat is a factor:

    ✓ Slip shorts or bike shorts for under dresses
    ✓ Body Glide For Her — applied before you leave
    ✓ Liquid I.V. packets — one per day minimum
    ✓ Sweat-absorbing handkerchiefs — pocket-sized, worth it
    ✓ JISULIFE handheld fan — for outdoor waiting
    ✓ Wide leg pants or lightweight drawstring shorts
    ✓ Cooling towel for afternoon heat
    ✓ Backup shirt in your day bag
    ✓ SPF and a hat

    Warm-weather travel is genuinely enjoyable when your clothes and your plan are working with your body instead of against it. Getting those basics right makes everything else easier.


    As an Amazon Associate, I earn from qualifying purchases. See my full Affiliate Disclosure for details.

  • How I Prevent Stomach Issues on Long Flights

    How I Prevent Stomach Issues on Long Flights

    This post contains affiliate links. If you purchase through a link, I may earn a small commission at no extra cost to you. Full disclosure here.

    Nothing ruins the start of a trip faster than arriving bloated, nauseous, or dealing with digestive issues before you’ve even left the airport.

    I have IBS, which means I’ve had to get more deliberate about this than most people do. But even without a specific condition, long flights are genuinely hard on your digestive system — low humidity, pressure changes, sitting still for hours, disrupted meal timing, stress. Your body notices all of it.

    After years of flying for both work and vacation, these are the habits that have actually made a difference for me.

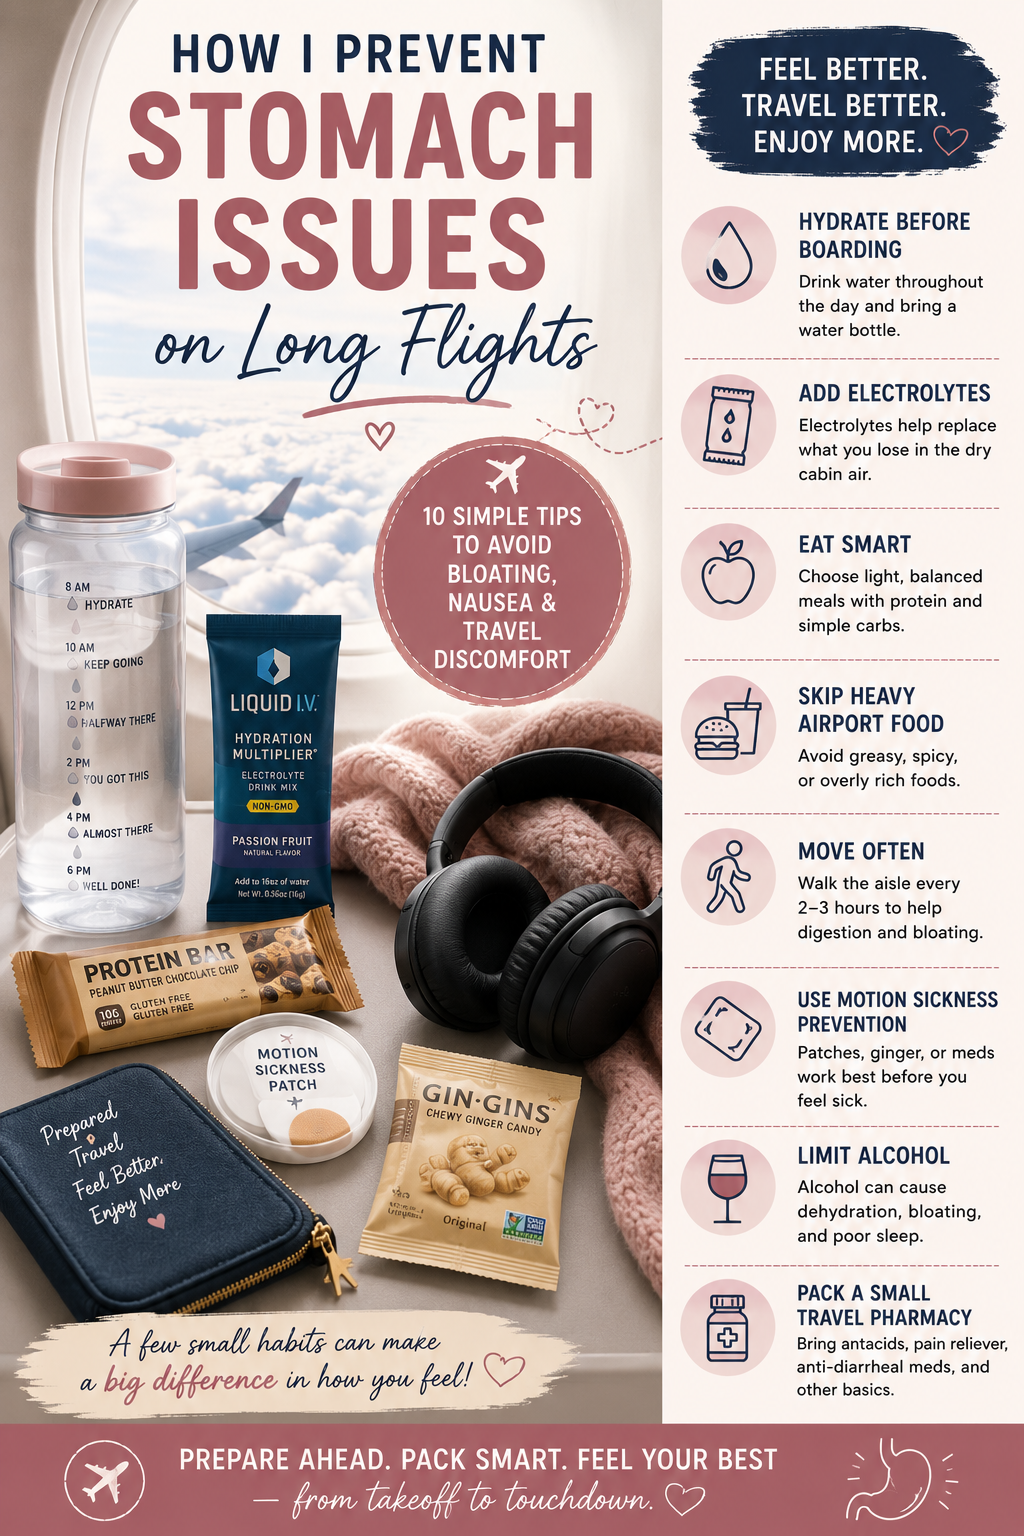
    How I prevent stomach issues on long flights — 10 simple tips infographic

    Start Hydrating Before Your Flight

    Most travelers wait until they’re thirsty. By then you’re already behind.

    Airplane cabins run at humidity levels so low they pull moisture out of everything — including you. The dehydration starts before you even reach cruising altitude, and it compounds over a long flight in ways that show up as headaches, fatigue, bloating, and general misery on arrival.

    What I do: drink water steadily throughout the day before flying, bring an empty water bottle through security, and add a Liquid I.V. Hydration Multiplier packet once I’ve filled it past the checkpoint. One packet does noticeably more than plain water — it’s the difference between drinking a lot and actually absorbing it. The Concord Grape flavor is the one I keep coming back to.


    Skip the Airport “Treat Yourself” Meal

    Airport food is designed for impulse and convenience, not for how you’ll feel at 35,000 feet.

    Greasy food, heavy portions, and alcohol are all harder to process in a pressurized cabin. For me specifically — with IBS — this is non-negotiable. But even without a digestive condition, most people feel the difference between boarding heavy and boarding light.

    Before flying I skip: heavy fried foods, large burgers, excessive dairy, and anything very spicy. What I’ll actually eat before a flight: something with protein, fruit, rice, a simple sandwich, or easy carbohydrates that won’t sit heavily.

    This doesn’t mean eating sad airport salad. It just means being honest about what your body can actually handle at altitude.


    Don’t Fly on an Empty Stomach Either

    The opposite mistake is just as bad.

    Flying hungry — especially for IBS — can trigger nausea, headaches, and motion sickness faster than almost anything else. An empty stomach on a bumpy flight is not a good combination.

    I keep a few things in my carry-on specifically for this: BUILT Bar Puff Protein Bars are my go-to because they’re light enough to eat when you’re not fully hungry but substantial enough to actually help. Trail mix, crackers, and pretzels round it out. A small snack every few hours keeps things settled in a way that nothing else quite does.


    Check the Inflight Meal Before You Board

    This one took me too long to figure out.

    Most airlines publish their inflight menus online — and many let you pre-select special meals (low-fiber, low-fat, bland options) when you book. For anyone managing IBS or digestive sensitivities, this matters enormously. The difference between a standard inflight meal and a meal you’ve actually reviewed in advance is real.

    Before any flight with meal service, I look up the menu, note what’s likely safe, and often pre-order an alternative. It takes five minutes and has saved more than a few trips.


    Use Motion Sickness Prevention Before You Need It

    Most people wait until they feel sick. By then, it’s significantly harder to manage.

    The options I keep accessible: MQ Motion Sickness Patches go behind the ear and last up to 72 hours — one patch covers the flight and whatever comes after (buses, boats, winding roads). Chimes Ginger Chews are my gentler everyday option when I just need to settle things without medication. For turbulent flights, I use both.

    If you’re prone to motion sickness at all, start prevention before boarding — not after the seat belt sign goes on during a rough patch.


    Limit Alcohol

    A glass of wine can sound like the right way to start a trip.

    But alcohol at altitude accelerates dehydration, disrupts sleep quality even when it helps you fall asleep, increases bloating, and tends to produce worse headaches than it would on the ground. On overnight or international flights especially, the cost outweighs the relaxation.

    I don’t drink on flights over a few hours. That’s a personal call, but it’s one I’ve never regretted mid-flight.


    Go Easy on Carbonated Drinks

    Cabin pressure causes gas to expand. This is straightforward physics, and your digestive system doesn’t get an exemption.

    Carbonated drinks — even sparkling water — can cause noticeably more bloating and discomfort in the air than they would on the ground. For anyone already managing digestive sensitivity, still water is the clear choice. The flight attendant offering ginger ale with kindness is a nice gesture, but the bubbles are genuinely not your friend at altitude.


    Skip the Coffee If You Can

    I don’t drink coffee, which I’ve come to think is probably an accidental advantage on travel days.

    For those who do: caffeine is a diuretic, which means it actively works against the hydration you’re trying to maintain. It can also irritate the stomach lining, increase acid production, and speed up motility in ways that become uncomfortable when you’re trapped in a small seat at 35,000 feet. Combined with the dehydration already happening from cabin air, it’s a lot for your system to manage.

    If coffee is non-negotiable, the approach that seems to help: eat something substantial first, drink extra water alongside it, and keep it to one serving rather than refilling all morning before you board. Your stomach at altitude is a different environment than your stomach at home.


    Walk Every Few Hours

    Movement helps digestion more than most people expect.

    Sitting still for hours slows everything down — circulation, digestion, all of it. Even short walks to the back of the plane and back help. I try to get up every two to three hours on longer flights, and on overnight flights I’ll do a few laps of the cabin before trying to sleep.

    COOLOVER Copper Compression Socks also help here. They improve circulation in a way that reduces the heavy, stiff feeling that sets in on long-haul flights — and better circulation means everything is moving a bit more the way it should.


    Pack a Small Travel Pharmacy

    I keep a dedicated section of my airplane essentials pouch for stomach and health items, organized in a travel pill organizer so I’m not digging through loose packets mid-flight.

    Stomach essentials: antacids, anti-diarrheal medication, Chimes Ginger Chews, MQ Motion Sickness Patches.

    General: pain reliever, allergy medication, TheraTears Eye Drops.

    Hopefully I won’t need most of it. But having it there means not spending the first hour at my destination looking for a pharmacy.


    Prioritize Sleep

    Poor sleep affects digestion more than most people connect.

    I’m noticeably more prone to stomach issues and motion sensitivity when I’m running on bad sleep. Before a long-haul flight I try to sleep well the night before, and on the plane I use Bose QuietComfort Headphones and an Albatross Eye Mask to actually rest. The noise cancellation makes a bigger difference than I expected — engine drone is more disruptive to sleep than you realize until it’s gone.

    The better rested I board, the better I feel on arrival. It’s that straightforward.


    My Long Flight Survival Kit

    For flights over four hours, this is what’s always with me:

    ✓ Liquid I.V. packet
    ✓ BUILT Bar Protein Bar
    ✓ Motion Sickness Patches
    ✓ Ginger Chews
    ✓ TheraTears Eye Drops
    ✓ Portable Charger
    ✓ Noise-Canceling Headphones

    The goal isn’t a perfect flight. It’s arriving at your destination feeling like a person — not spending the first day of your trip recovering from the journey.


    As an Amazon Associate, I earn from qualifying purchases. See my full Affiliate Disclosure for details.